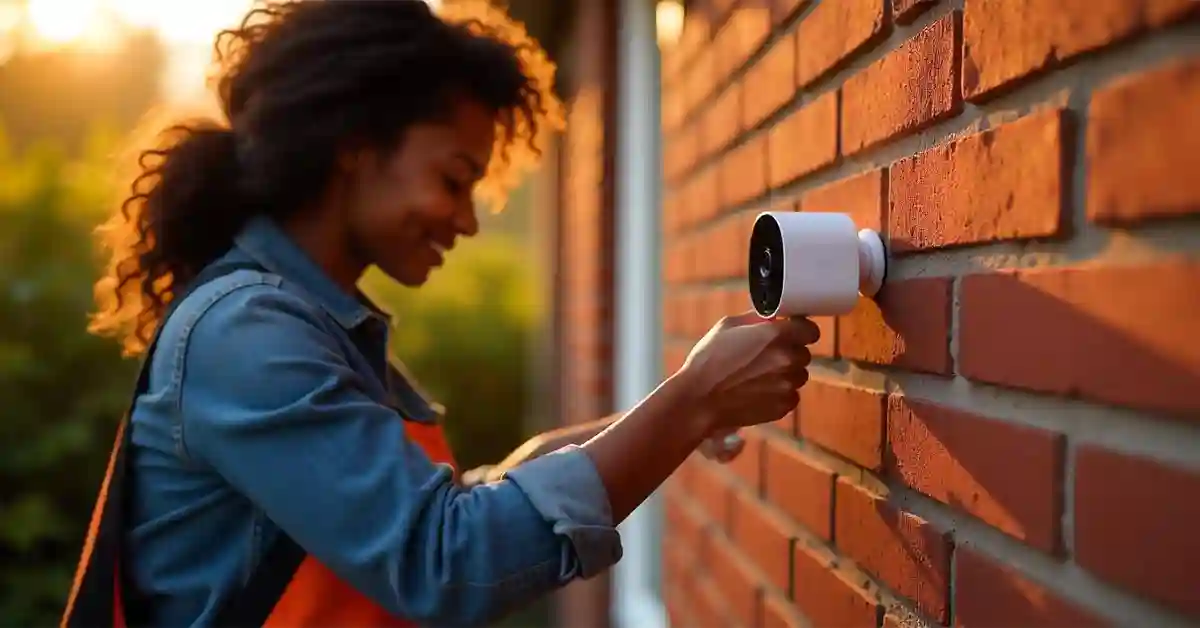
Keeping your home safe is important for everyone. One way to do this is by setting up a Google Nest Outdoor Camera. This camera lets you watch over your home, even when you’re not there. But what if you want to put it on a brick wall? Don’t worry! We’ll show you how to mount a Google Nest Outdoor Camera to brick easily.
How do you mount a Google Nest Outdoor Camera to a brick wall? Many homeowners and tech enthusiasts ask this question. Mounting it on brick might seem tricky, but with the right tools and steps, it’s simple. This guide will help you learn the steps and tools needed to securely mount your camera on brick.
Installing your camera properly ensures it works well. It gives you clear views of your surroundings and helps keep your home safe. Ready to learn how to mount your camera? Read on to discover the secrets to a successful installation.
Why Choose a Google Nest Outdoor Camera?
The Google Nest Outdoor Camera is a smart choice for home security. It offers clear video quality so that you can watch your home anytime. It connects to your phone, letting you see what’s happening outside, no matter where you are. Plus, it has features like night vision, making it good for day and night use.
Another big advantage is its durability. It’s built to withstand weather changes, meaning it can handle rain or shine. This makes it great for use outdoors. With its sleek design, it blends well with your home’s exterior, adding both security and style.
Lastly, it’s easy to use. The app is user-friendly, allowing you to control settings and view footage easily. Whether you’re tech-savvy or not, you’ll find using the Google Nest Outdoor Camera a breeze.
Tools You Will Need for Mounting
Before you start, gather the tools you’ll need for this project. Here’s a list to make sure you’re ready:
- Drill and Drill Bits: You’ll need a drill to make holes in the brick. Use masonry drill bits, as they’re made for hard surfaces like brick.
- Screwdriver: A screwdriver helps secure the camera bracket onto the wall.
- Level: Ensure your camera is straight and level for the best view.
- Pencil: Mark the spots where you’ll drill holes.
- Wall Anchors and Screws: These will hold your camera securely to the brick.
- Safety Goggles: Protect your eyes while drilling.
Having these tools ready will make the process smoother and faster.
Choosing the Perfect Spot for Your Camera
Finding the right spot is key to getting the best view with your camera. Look for a place that covers most of the area you want to monitor. It should also be high enough to avoid tampering and low enough for a clear view.
Consider areas like your front door, backyard, or driveway. These spots are common entry points and benefit from extra surveillance. Avoid placing the camera facing direct sunlight, as it can affect the video quality.
Take time to test a few spots before drilling. This ensures you choose the best location for your needs.
Preparing Your Brick Wall for Installation
Before mounting the camera, prepare the brick wall. Clean the area to remove any dirt or dust. This helps the wall anchors adhere better.
Next, use your pencil to mark where you’ll drill holes. Hold the camera bracket against the wall and mark the spots through the screw holes. Ensure the bracket is level by using your level tool.
Double-check your marks before drilling. This step ensures your camera will be mounted correctly and securely.
Drilling Holes in Brick
Now it’s time to drill. Put on your safety goggles to protect your eyes. Use your drill and masonry bit to drill holes where you marked.
Drill slowly and steadily. Brick can be tough, so take your time to avoid damaging it. Make sure the holes are deep enough for the wall anchors to fit snugly.
After drilling, clean out any dust from the holes. This step ensures the anchors fit well and hold the screws securely.
Installing Wall Anchors and Screws
With the holes ready, insert the wall anchors into them. Gently tap them with a hammer if needed to ensure they’re flush with the wall.
Next, align the camera bracket with the holes. Use your screwdriver to drive the screws into the anchors, securing the bracket to the wall. Make sure it’s tight and doesn’t wobble.
This strong foundation is crucial for the stability of your camera.
Attaching the Camera to the Bracket
Now, it’s time to attach the camera to the bracket. Follow the instructions provided with your Google Nest Outdoor Camera for this step.
Usually, this involves sliding the camera into the bracket or securing it with a few more screws. Make sure it’s firmly attached and doesn’t move or tilt.
Confirm the camera is positioned correctly and provides the coverage you desire.
Connecting Your Camera to Power
Once mounted, your camera needs power. Most outdoor cameras require a power cable. Run the cable from the camera to a nearby outlet.
Ensure the cable is hidden or secured against the wall to prevent tripping hazards. You can use cable clips or conduit to keep it neat and tidy.
If using an extension cord, ensure it’s rated for outdoor use to withstand weather conditions.
Setting Up the Google Nest App
To get the most out of your camera, set up the Google Nest app. Download it to your smartphone and create an account if you haven’t already.
Follow the prompts to add your new camera. Connect it to your Wi-Fi network to enable live streaming and notifications.
The app allows you to adjust settings, view footage, and receive alerts, keeping you connected to your home at all times.
Adjusting Camera Settings for Optimal Performance
Once connected, take some time to adjust your camera settings. Set the motion detection sensitivity to suit your environment.
Schedule when you want to receive notifications, such as during work hours or at night. Explore other features like audio detection or familiar faces recognition.
These settings ensure your camera works efficiently and meets your security needs.
Maintaining Your Outdoor Camera
Regular maintenance keeps your camera in top shape. Check periodically to ensure it’s still securely mounted.
Clean the lens with a soft cloth to maintain video clarity. Remove any cobwebs or debris that might accumulate over time.
Test your camera monthly to confirm it’s capturing the intended area and functioning properly.
Troubleshooting Common Issues
Sometimes, things don’t go as planned. If your camera isn’t connecting to Wi-Fi, try restarting your router.
For unclear footage, clean the lens and check for any obstructions. If the camera isn’t aligned, adjust the bracket or mount.
Most issues have simple solutions, and the Google Nest support team is always available to help.
Enhancing Security with Additional Cameras
One camera is great, but multiple provide even better coverage. Consider adding more cameras to cover all entry points around your home.
Position additional cameras to eliminate blind spots and provide full coverage. This enhances your security system and peace of mind.
Each camera can be managed through the same Google Nest app, making monitoring easy and efficient.
Joining the Google Nest Community
Being part of the Google Nest community offers benefits. Share tips and experiences with other users online.
Participate in forums or social media groups to stay updated on new features or security tips.
Community support can enhance your experience and provide additional peace of mind.
FAQs With Answers
What tools are needed to mount a Google Nest Outdoor Camera on brick?
You’ll need a drill with masonry bits, a screwdriver, a pencil, wall anchors, screws, a level, and safety goggles. These tools help you secure the camera to a brick wall effectively.
Is it hard to drill into brick for mounting a Nest camera?
Drilling into brick can be challenging due to its hardness. However, using a masonry bit and drilling slowly makes the task manageable. Take your time to ensure accuracy and prevent damage.
Can I mount the Nest camera anywhere on my brick house?
While you can mount it almost anywhere, it’s best to choose spots that provide the best coverage, like near entry points. Avoid areas with direct sunlight to maintain video quality.
How do I connect the Nest camera to my Wi-Fi?
Use the Google Nest app on your smartphone. Follow the steps to add your camera and connect it to Wi-Fi. Ensure your camera is within range of your router for a stable connection.
What should I do if my Nest camera isn’t working properly?
First, check for power and internet connection issues. Clean the lens for clarity and adjust settings in the app. If problems persist, consult Google Nest’s support for assistance.
Conclusion
Mounting your Google Nest Outdoor Camera to a brick wall might seem daunting, but with the right tools and guidance, it’s a straightforward process. This installation enhances your home security, providing peace of mind. By following this step-by-step guide, you ensure a safe, reliable setup. Remember, proper maintenance and optimal settings keep your camera functioning effectively. Ready to boost your home security? Start mounting your camera today and join a community of tech enthusiasts dedicated to safety and innovation.


