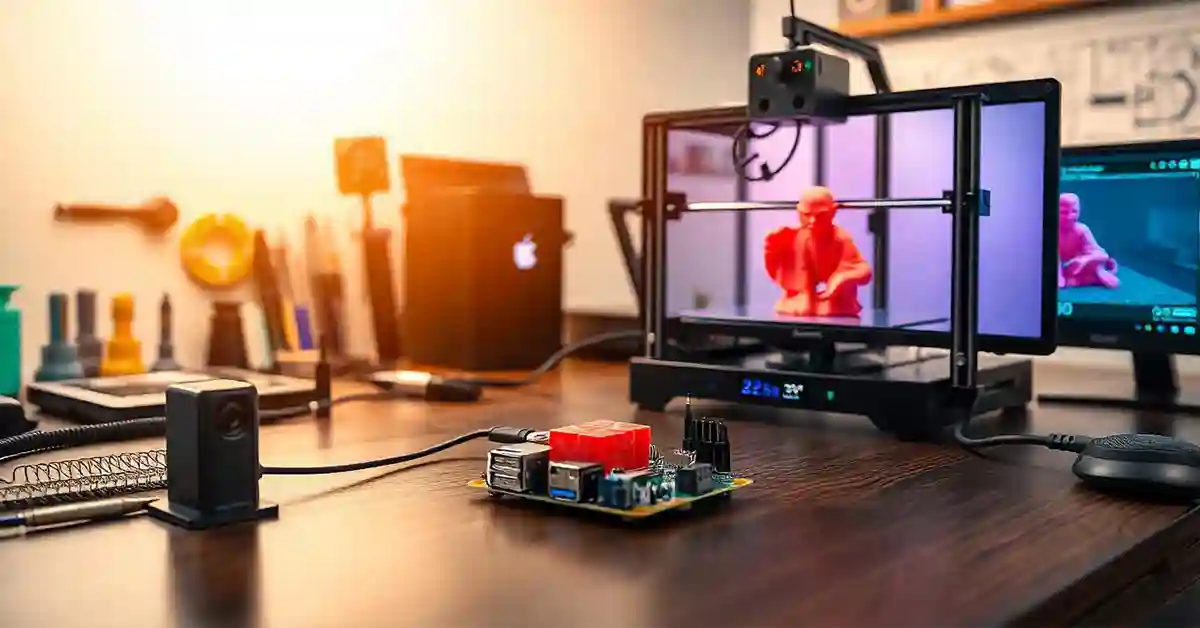
In the world of 3D printing, technology is constantly evolving, bringing innovative tools and solutions to the table. One such advancement is the integration of Octoprint, Raspberry Pi 5, and Pi Camera V3. This powerful combination is transforming the way enthusiasts and professionals manage and monitor their 3D printing projects, offering greater control and functionality than ever before. With Octoprint as the powerful software engine, Raspberry Pi 5 providing the robust hardware backbone, and Pi Camera V3 adding the visual element to the mix, the possibilities are practically endless.
What makes the Octoprint RPi5 Pi Camera V3 setup so intriguing? How does this combination enhance the 3D printing experience and solve common problems faced by users? These are just a couple of the thought-provoking questions we’ll explore in this guide. The integration of these technologies not only addresses issues related to monitoring and managing 3D prints but also opens up new avenues for creative expression and precision. This article will guide you through the features, benefits, and practical applications of each component, helping you understand how they work together to elevate your 3D printing game.
Harnessing the full potential of Octoprint, Raspberry Pi 5, and Pi Camera V3 offers numerous advantages, from improved print quality to enhanced user control and real-time monitoring capabilities. This setup is a game-changer for 3D printing enthusiasts who wish to take their projects to the next level. By the end of this article, you’ll have a comprehensive understanding of why this combination is so impactful and be ready to implement these tools into your own projects. Read on to discover the endless possibilities that await with Octoprint RPi5 Pi Camera V3.
Understanding Octoprint and Its Capabilities
Octoprint is a powerful open-source software that allows you to control and monitor your 3D printer remotely. It acts as a user-friendly interface between you and your printer, making the whole printing process more efficient. With Octoprint, you can start, stop, and pause your prints, as well as monitor the progress remotely. It’s like having a personal assistant for your 3D printing projects.
One of the standout features of Octoprint is its ability to integrate with various plugins. These plugins expand its capabilities and provide additional functionality, such as sending notifications to your phone when a print is complete or allowing you to create time-lapse videos of your prints. This modularity makes Octoprint highly customizable to fit your specific needs.
Octoprint also excels in its ability to provide detailed feedback on your prints. It logs data on temperature, print speeds, and other crucial metrics, allowing you to analyze and optimize your 3D printing process. This data-driven approach can significantly improve the quality of your prints, making Octoprint an invaluable tool for any 3D printing enthusiast.
The Evolution of Raspberry Pi
The Raspberry Pi has come a long way since its inception, evolving from a simple computer for beginners into a versatile piece of hardware capable of powering complex projects. The Raspberry Pi 5 is the latest iteration, boasting more power, speed, and connectivity options. This makes it an ideal choice for running Octoprint and managing your 3D printer.
With its increased processing power, the Raspberry Pi 5 can handle more demanding tasks, such as running multiple plugins simultaneously in Octoprint. Its improved performance ensures that everything runs smoothly, even when managing large and complex prints. This increased capability allows you to experiment with more advanced features and integrate new technologies into your 3D printing setup.
One of the key advantages of the Raspberry Pi 5 is its connectivity options. With built-in Wi-Fi and Bluetooth, you can easily connect your 3D printer to your network, enabling remote control and monitoring via Octoprint. This seamless connectivity is a game-changer, allowing you to manage your prints from anywhere in the world.
Introducing the Pi Camera V3
The Pi Camera V3 is a powerful addition to the Raspberry Pi ecosystem, offering high-quality video and still image capture capabilities. This camera module is perfect for monitoring your 3D prints in real-time, providing a live feed of your printer’s progress. With the Pi Camera V3, you can easily spot any issues or mistakes in your prints and make adjustments on the fly.
One of the standout features of the Pi Camera V3 is its ability to capture time-lapse videos of your prints. This feature allows you to create stunning visual records of your projects, showcasing the entire printing process in a concise and engaging format. Time-lapse videos can be particularly useful for sharing your creations on social media or documenting your progress for future reference.
The Pi Camera V3 also excels in low-light conditions, thanks to its improved sensor and lens technology. This ensures that you can capture clear and detailed images of your prints, even in dimly lit environments. This capability is invaluable for monitoring your printer overnight or in situations where lighting conditions are less than ideal.
Setting Up Your Octoprint RPi5 Pi Camera V3 Combo
Setting up your Octoprint RPi5 Pi Camera V3 combo might seem daunting at first, but with a little patience and guidance, it can be a rewarding experience. First, you’ll need to install Octoprint on your Raspberry Pi 5. This involves downloading the Octoprint image and flashing it onto an SD card, which you’ll then insert into the Pi.
Once Octoprint is installed, you’ll need to connect your 3D printer to the Raspberry Pi via USB. Make sure your printer is compatible with Octoprint to avoid any compatibility issues. After the physical connections are made, you can power up your Raspberry Pi and start configuring Octoprint through its web interface.
To integrate the Pi Camera V3, you’ll need to physically connect it to your Raspberry Pi and enable it through the Octoprint settings. The camera module connects to the Pi via a ribbon cable, and once it’s connected, you can adjust the settings to suit your needs. With everything set up, you’ll have a powerful 3D printing monitoring and management system at your fingertips.
Maximizing Print Quality with Octoprint
Octoprint offers a plethora of tools and features to help you maximize the quality of your 3D prints. With real-time monitoring and detailed feedback, you can make informed decisions about your printer’s settings. This data-driven approach is crucial for achieving the best possible results and can help you avoid common printing issues.
One of the most valuable features of Octoprint is its ability to log data on your prints. This includes temperature readings, print speeds, and more. By analyzing this data, you can identify patterns and make adjustments to your printer’s settings for optimal performance. This feedback loop is essential for continuous improvement and achieving high-quality prints consistently.
Octoprint also allows for easy integration with external tools and plugins that further enhance print quality. For example, you can use plugins to fine-tune your printer’s calibration, adjust print speeds, and even control your printer’s cooling system. With these tools at your disposal, you can achieve professional-grade prints with ease.
Monitoring Your Prints with Pi Camera V3
The Pi Camera V3 is an essential component of your Octoprint setup, providing real-time visual feedback on your prints. With a live video feed, you can monitor your printer’s progress and detect any issues early on. This is particularly useful for catching mistakes or malfunctions before they ruin an entire print.
In addition to real-time monitoring, the Pi Camera V3 also allows you to capture time-lapse videos of your prints. This feature is not only visually impressive but also serves as a valuable tool for analyzing your printing process. By reviewing time-lapse videos, you can identify areas for improvement and make necessary adjustments to your setup.
The Pi Camera V3’s low-light capabilities also make it ideal for monitoring your prints overnight or in dim environments. With its improved sensor and lens technology, you can capture clear and detailed images regardless of the lighting conditions. This ensures that you always have a reliable visual record of your printing progress.
Addressing Common Issues with Octoprint
Even with the best setup, 3D printing can be prone to issues and challenges. Octoprint provides several tools and features to help you address these common problems and ensure a smooth printing experience. From troubleshooting connectivity issues to optimizing print settings, Octoprint has you covered.
One common issue that users face is connectivity problems between their 3D printer and Raspberry Pi. Octoprint offers troubleshooting guides and community support to help you resolve these issues quickly. By following these resources, you can ensure a stable connection and prevent disruptions during your printing sessions.
Another challenge that users often encounter is print quality issues, such as layer shifting or poor surface finish. Octoprint’s real-time monitoring and data logging capabilities allow you to diagnose these issues and make necessary adjustments. By fine-tuning your printer’s settings and addressing any mechanical problems, you can achieve consistently high-quality prints.
Enhancing User Experience with Plugins
Octoprint’s plugin system is one of its most powerful features, allowing you to customize and enhance your 3D printing setup. With a wide range of plugins available, you can tailor Octoprint to suit your specific needs and preferences. Whether you’re looking to improve print quality, add new features, or streamline your workflow, there’s a plugin for you.
One popular plugin is the Octolapse plugin, which allows you to create stunning time-lapse videos of your prints. This feature is not only visually impressive but also serves as a valuable tool for analyzing your printing process. By reviewing time-lapse videos, you can identify areas for improvement and make necessary adjustments to your setup.
Another useful plugin is the OctoPrint-PrintTimeGenius plugin, which provides more accurate print time estimates. This can be particularly helpful for planning your printing schedule and ensuring that your projects are completed on time. With this plugin, you can better manage your time and resources, maximizing your productivity.
Troubleshooting Octoprint and Pi Camera V3
While Octoprint and the Pi Camera V3 offer a powerful 3D printing setup, they can occasionally encounter issues that require troubleshooting. Common problems include connectivity issues, camera feed problems, and software glitches. By following some basic troubleshooting steps, you can quickly resolve these issues and get back to printing.
If you encounter connectivity issues between your Raspberry Pi and 3D printer, start by checking your USB connections and ensuring that your printer is powered on. You can also try restarting your Raspberry Pi and printer to reset the connection. If the issue persists, consult the Octoprint community forums for additional support and guidance.
For issues with the Pi Camera V3, such as a black or frozen video feed, check the physical connection between the camera and Raspberry Pi. Ensure that the ribbon cable is securely connected and that the camera module is enabled in the Octoprint settings. If the problem continues, try rebooting your Raspberry Pi and updating your Octoprint software to the latest version.
Customizing Your Octoprint Interface
Octoprint’s user-friendly interface can be customized to suit your preferences and enhance your overall experience. With the ability to adjust the layout, color scheme, and widgets, you can create a personalized environment that makes managing your 3D printer more enjoyable and efficient.
One way to customize your Octoprint interface is by rearranging the layout to prioritize the information that’s most important to you. You can move and resize widgets to create a dashboard that suits your workflow. This customization allows you to have all the essential information at your fingertips, streamlining your printing process.
Another option is to change the color scheme of your Octoprint interface. Whether you prefer a dark mode for late-night printing sessions or a bright and vibrant theme, Octoprint offers a variety of customization options to match your style. This personalization makes using Octoprint a more enjoyable and visually pleasing experience.
Exploring Advanced Features of Octoprint
Octoprint is not just a tool for basic 3D printer management; it also offers advanced features that can elevate your printing projects to new heights. These features include support for multiple printers, custom scripts, and integration with external tools and services. By exploring these advanced capabilities, you can unlock the full potential of your Octoprint setup.
If you have multiple 3D printers, Octoprint allows you to manage them all from a single interface. This centralized control makes it easier to monitor and coordinate your printing projects, ensuring that everything runs smoothly. With Octoprint, you can streamline your workflow and maximize your productivity, even with a multi-printer setup.
Octoprint also supports custom scripts, allowing you to automate and customize various aspects of your printing process. Whether you want to create custom start and end scripts for your prints or automate specific tasks, Octoprint’s scripting capabilities provide the flexibility you need. This automation can save you time and effort, allowing you to focus on other aspects of your projects.
Understanding the Role of Raspberry Pi in 3D Printing
The Raspberry Pi plays a crucial role in 3D printing, serving as the central hub for managing and controlling your printer. With its powerful processing capabilities and connectivity options, the Raspberry Pi is an ideal platform for running Octoprint and integrating with additional tools and devices.
One of the key advantages of using a Raspberry Pi for 3D printing is its low cost and accessibility. Compared to traditional computers, the Raspberry Pi is an affordable and compact solution that can easily be integrated into your 3D printing setup. Its small form factor and low power consumption make it a practical choice for any workspace.
The Raspberry Pi also offers flexibility and expandability, allowing you to customize and enhance your 3D printing setup. With support for various accessories and peripherals, you can tailor your Raspberry Pi to meet your specific needs. Whether you want to add additional camera modules, sensors, or other devices, the Raspberry Pi provides a versatile platform for your 3D printing projects.
Exploring the Benefits of Pi Camera V3
The Pi Camera V3 offers numerous benefits for 3D printing enthusiasts, providing high-quality imaging capabilities and enhanced functionality. With its improved sensor and lens technology, the Pi Camera V3 delivers clear and detailed images, even in challenging lighting conditions. This makes it an invaluable tool for monitoring and analyzing your prints.
One of the standout features of the Pi Camera V3 is its ability to capture high-resolution still images and videos. This allows you to document your printing projects and create visually stunning records of your progress. Whether you’re sharing your prints on social media or creating a portfolio of your work, the Pi Camera V3 offers the image quality you need to showcase your creations.
The Pi Camera V3 also excels in its flexibility and compatibility with various Raspberry Pi models. This ensures that you can easily integrate it into your existing setup, regardless of the Raspberry Pi version you’re using. With its versatility and ease of use, the Pi Camera V3 is a valuable addition to any 3D printing setup.
The Future of 3D Printing with Octoprint and Raspberry Pi
The combination of Octoprint and Raspberry Pi is paving the way for the future of 3D printing, offering innovative solutions and capabilities that were previously unimaginable. With their powerful features and user-friendly interfaces, these tools are making 3D printing more accessible and efficient for enthusiasts and professionals alike.
One of the key trends in the future of 3D printing is the integration of smart technologies and automation. Octoprint and Raspberry Pi are at the forefront of this movement, providing the tools and infrastructure needed to create smart and connected 3D printing setups. With features like real-time monitoring, remote control, and data analytics, the future of 3D printing is brighter than ever.
Another exciting development in 3D printing is the increasing focus on sustainability and environmental impact. Octoprint and Raspberry Pi are helping to drive this change by providing tools that enable more efficient and resource-conscious printing practices. By optimizing print settings and reducing waste, these technologies are contributing to a more sustainable future for 3D printing.
FAQs With Answers
What is Octoprint used for?
Octoprint is a software that allows you to control and monitor your 3D printer remotely. It provides a user-friendly interface to manage your printing projects efficiently.
Can I use Raspberry Pi 5 with Octoprint?
Yes, Raspberry Pi 5 is compatible with Octoprint and can run the software smoothly. Its advanced features and connectivity make it an ideal choice for managing 3D printers.
What are the benefits of using Pi Camera V3 for 3D printing?
The Pi Camera V3 offers high-quality video and still image capture, allowing you to monitor your prints in real-time and create time-lapse videos. It excels in low-light conditions, ensuring clear visuals.
How do I set up Octoprint with Raspberry Pi?
To set up Octoprint with Raspberry Pi, you’ll need to download the Octoprint image, flash it onto an SD card, and insert it into your Raspberry Pi. Then, connect your printer via USB and configure Octoprint through its web interface.
Can Octoprint work with multiple 3D printers?
Yes, Octoprint can manage multiple 3D printers from a single interface. This feature allows for streamlined control and coordination of multiple printing projects.
Conclusion
The integration of Octoprint, Raspberry Pi 5, and Pi Camera V3 is revolutionizing the world of 3D printing, offering enhanced control, monitoring, and customization options. This powerful combination provides a seamless and efficient experience for both beginners and seasoned enthusiasts. By understanding and harnessing the potential of these tools, you can elevate your 3D printing projects to new heights, achieving impressive results with ease. Whether you’re looking to improve your print quality, streamline your workflow, or explore advanced features, this setup offers endless possibilities. Take the next step in your 3D printing adventure and experience the future of technology today.
