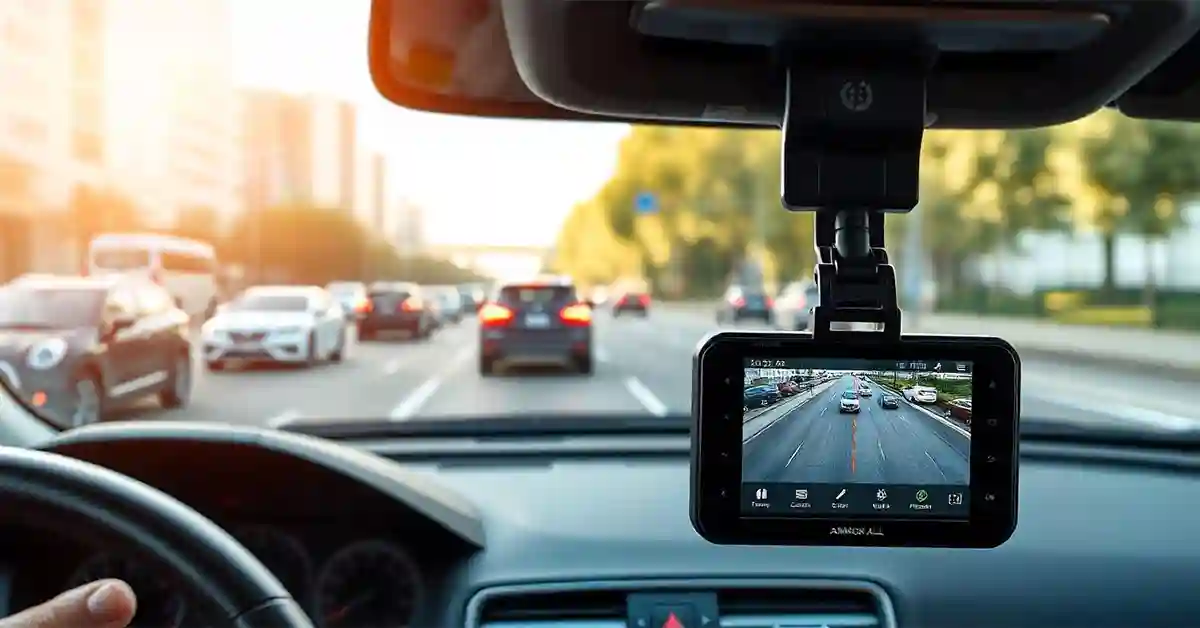
In today’s fast-paced world, safety on the road is more important than ever. Enter the Armor All Dashboard Camera ADC2 1003 BLK, a device that ensures peace of mind while driving. This innovative piece of technology not only captures every moment of your drive but also provides evidence in case of an accident. Whether you are a car enthusiast, a DIY lover, or someone who values road safety, understanding how this dashboard camera works can significantly enhance your driving experience.
Have you ever wondered how to set up the Armor All Dashboard Camera ADC2 1003 BLK? Or perhaps you’re curious about the unique features that set it apart from other dash cams? Understanding the functionality and installation process is crucial for maximizing its benefits. This article will guide you through the steps of installing and using this powerful dashboard camera, ensuring that you get the most out of your purchase. From exploring its key features to offering troubleshooting tips, we will cover everything you need to know.
The advantages of using the Armor All Dashboard Camera are numerous. Not only does it provide high-definition recordings of your journeys, but it also offers features like motion detection and parking mode for ultimate security. Furthermore, this article will provide step-by-step instructions tailored for tech-savvy drivers and general users alike. By the end of this guide, you’ll be well-equipped to install and utilize your dash cam, enhancing both your safety and driving experience. Let’s get started!
Understanding the Armor All ADC2 1003 BLK
The Armor All Dashboard Camera ADC2 1003 BLK is a compact, high-tech device that records your driving adventures. This dash cam is designed to capture clear, high-resolution video footage, making it essential for anyone who spends a lot of time on the road.
This dashboard camera is different from others because it comes with special features like motion detection and parking mode. These features help keep your vehicle safe even when you’re not driving. Plus, the camera’s sleek design ensures it blends seamlessly with your car’s interior.
With its easy-to-use interface, the Armor All ADC2 1003 BLK is perfect for tech enthusiasts and beginners alike. It offers peace of mind to drivers, knowing they have a reliable device to capture every detail of their journeys.
Key Features of the Armor All Dash Cam
The Armor All Dashboard Camera ADC2 1003 BLK boasts several impressive features that make it a must-have for drivers. One of its standout features is its high-definition video recording capability, which ensures crystal-clear footage every time.
The camera also includes motion detection, which means it starts recording automatically when movement is detected. This is especially useful for capturing events when your car is parked. Additionally, the parking mode feature provides added security when you’re away from your vehicle.
Another key feature is its user-friendly interface. The dash cam is easy to set up and operate, making it accessible for users of all tech levels. These features combine to offer a comprehensive solution for anyone looking to enhance their driving experience.
Preparing for Installation
Before you start using your new Armor All Dashboard Camera ADC2 1003 BLK, it’s important to set it up correctly. Begin by gathering all the necessary components included in the box, such as the camera unit, mounting bracket, and power cables.
Choose a location on your dashboard that provides a clear view of the road ahead. It’s best to install the camera behind the rearview mirror to avoid obstructing your view. Clean the windshield area where the camera will be mounted to ensure a strong adhesive bond.
Once you’ve chosen the right spot, read through the instruction manual carefully to understand the installation process. Proper preparation will make the setup process smooth and hassle-free.
Step-by-Step Installation Guide
Installing the Armor All Dashboard Camera ADC2 1003 BLK is a straightforward process that can be completed in a few simple steps. First, attach the mounting bracket to the camera unit. Ensure it is tightly secured to prevent any movement while driving.
Next, affix the camera to the windshield using the adhesive provided. Make sure it is positioned at the center for optimal recording. Adjust the camera angle as needed to capture the best view of the road.
Connect the power cable to the camera and plug it into your car’s auxiliary power outlet. Once connected, turn on the ignition to power up the camera. With everything set up, your dash cam is ready to use!
Navigating the User Interface
The Armor All Dashboard Camera ADC2 1003 BLK comes with a user-friendly interface that makes it easy to operate. The screen displays important information such as battery status, recording mode, and settings.
To access the menu, use the buttons located on the side of the camera. This allows you to adjust settings like video resolution, loop recording, and motion detection sensitivity. Take some time to familiarize yourself with these settings to optimize your camera’s performance.
Navigating the interface is intuitive, allowing you to quickly switch between modes and access recorded footage. This ensures that you can focus on the road while the camera takes care of the recording.
Optimizing Video Settings
One of the benefits of the Armor All Dashboard Camera ADC2 1003 BLK is its customizable video settings. You can adjust the resolution to capture high-quality footage, which is especially useful for identifying details during playback.
Experiment with different loop recording settings to control the length of recorded clips. This feature ensures that your memory card doesn’t fill up quickly, as it overwrites the oldest footage first.
Additionally, adjust the exposure settings to suit different lighting conditions. This will ensure your recordings are clear and detailed, whether you’re driving during the day or night.
Utilizing Motion Detection
The motion detection feature of the Armor All Dashboard Camera ADC2 1003 BLK is a valuable addition for drivers who want extra security. This feature ensures the camera starts recording whenever movement is detected around the vehicle.
To activate motion detection, access the settings menu and toggle the feature on. You can adjust the sensitivity level to suit your preferences. A higher sensitivity will detect smaller movements, while a lower setting will only trigger recording for more significant motion.
This feature is particularly useful for capturing incidents when your vehicle is parked. It provides peace of mind, knowing that any suspicious activity will be recorded, even when you’re not around.
Exploring Parking Mode
Parking mode is another standout feature of the Armor All Dashboard Camera ADC2 1003 BLK. It continues monitoring and recording even when your vehicle is turned off, offering protection against vandalism and theft.
To enable parking mode, make sure your camera is connected to a constant power source. Some vehicles offer a dedicated parking mode power kit that can be installed to provide continuous power to the camera.
Once activated, the camera will record any detected motion or impact. This feature is an excellent security measure for drivers who want to protect their vehicles when parked in unfamiliar areas.
Reviewing Recorded Footage
Reviewing recorded footage on the Armor All Dashboard Camera ADC2 1003 BLK is simple and convenient. The camera’s interface allows you to browse through recorded videos directly on the device.
If you prefer a larger screen, you can transfer the footage to a computer using the included USB cable. Simply connect the camera to your computer and access the files like you would with any external storage device.
Organize and save important clips for easy access later. The ability to review footage is essential for providing evidence in case of accidents or disputes.
Troubleshooting Common Issues
While the Armor All Dashboard Camera ADC2 1003 BLK is designed to be reliable, you may encounter occasional issues. Common problems include the camera not turning on, recording interruptions, or poor video quality.
If the camera doesn’t power on, check the connection to the power source and ensure the car’s ignition is on. For recording issues, make sure the memory card is properly inserted and formatted.
Poor video quality can be resolved by adjusting the resolution settings or cleaning the camera lens. Remember, the user manual provides additional troubleshooting tips to help resolve any issues you may encounter.
Enhancing Your Dash Cam Experience
To get the most out of your Armor All Dashboard Camera ADC2 1003 BLK, there are several enhancements you can consider. Investing in a high-capacity memory card ensures you have plenty of space for recorded footage.
Consider adding a rear-facing camera to capture both front and rear views, providing comprehensive coverage of your journeys. Some models are compatible with accessories like GPS modules for added functionality.
Regularly update the camera’s firmware to ensure optimal performance and access to new features. These enhancements can significantly improve your overall dash cam experience.
Maintaining Your Dashboard Camera
Proper maintenance of your Armor All Dashboard Camera ADC2 1003 BLK is essential for long-lasting performance. Regularly clean the camera lens to ensure clear recordings and check for any loose connections.
Keep the camera firmware updated to benefit from the latest improvements and security patches. Refer to the manufacturer’s website for instructions on how to update the firmware.
When not in use, store the camera in a safe place to protect it from damage. With proper care, your dashboard camera will continue to provide reliable performance for years to come.
FAQs With Answers
How do I install the Armor All Dashboard Camera ADC2 1003 BLK?
To install the Armor All Dashboard Camera ADC2 1003 BLK, attach the mounting bracket to the camera, affix the camera to your windshield, and connect the power cable to your car’s auxiliary power outlet.
What features does the Armor All Dashboard Camera ADC2 1003 BLK have?
The Armor All Dashboard Camera ADC2 1003 BLK features high-definition video recording, motion detection, parking mode, and a user-friendly interface for easy operation.
How can I review footage recorded by the dashboard camera?
You can review footage directly on the camera’s interface or transfer it to a computer using a USB cable for viewing on a larger screen.
Why is my dash cam not turning on?
If the dash cam doesn’t turn on, check the connection to the power source, ensure the car’s ignition is on, and verify that the memory card is inserted correctly.
How do I enable parking mode on my dashboard camera?
To enable parking mode, connect the camera to a constant power source and activate the feature through the camera’s settings menu.
Conclusion
The Armor All Dashboard Camera ADC2 1003 BLK is a powerful tool for enhancing road safety and recording your driving experiences. Its advanced features, easy installation, and user-friendly interface make it an ideal choice for drivers of all levels. By following the instructions provided in this guide, you can set up and optimize your dash cam for the best results. Whether you’re a tech enthusiast or a casual driver, the benefits of using a dashboard camera are undeniable. Equip your vehicle with the Armor All ADC2 1003 BLK and enjoy the peace of mind that comes with having a reliable witness on the road.