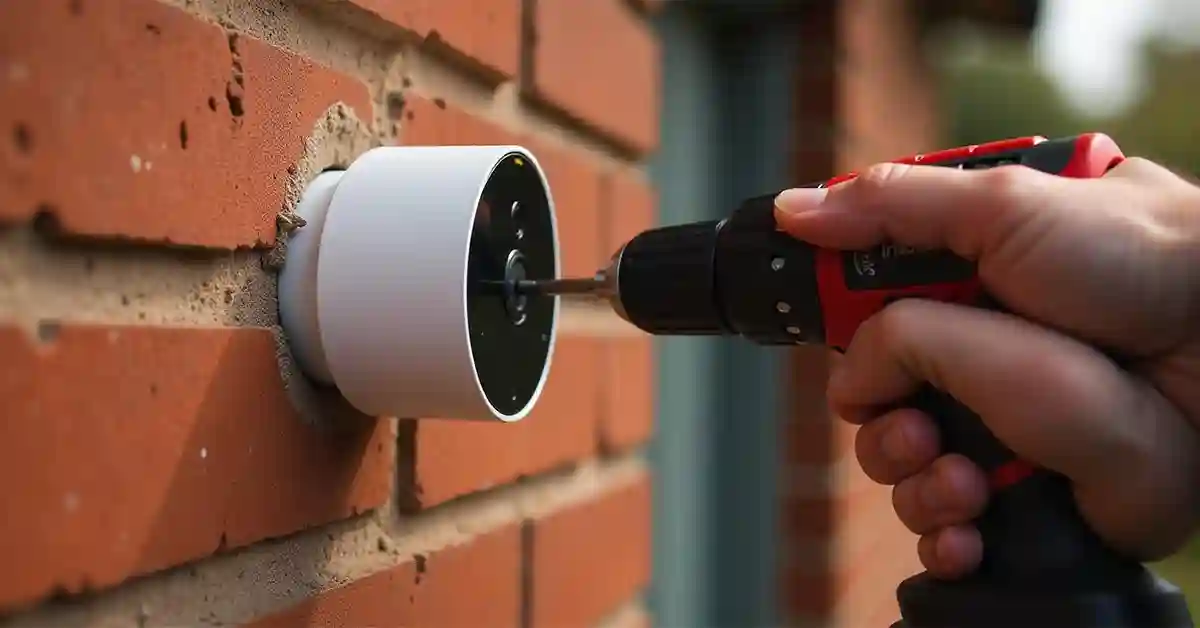
In the age of smart technology, keeping our homes safe has never been easier, thanks to devices like the Nest Camera. These cameras give us peace of mind, whether we’re keeping an eye on packages, pets, or the front door. But what if your home is made of brick? Mounting gadgets like the Nest Camera Battery onto such surfaces can seem daunting. Fear not! With the right guidance, you’ll find it’s simpler than it appears.
How do you mount a Nest Camera Battery to brick? This is a common question among DIY enthusiasts and home security seekers. Brick walls are sturdy, but they require specific tools and techniques. In this article, we’ll explore the straightforward steps to securely mount your camera, ensuring it stays put while providing a clear view of the surroundings.
Mounting a Nest Camera onto brick offers several benefits. It’s about enhancing security by providing a stable spot for your camera, often with a better field of view. Whether you’re a parent wanting to monitor your children or a DIY enthusiast eager to improve home safety, this guide is for you. Let’s get started on making your home a safer place.
Getting Started with the Right Tools
Before you begin, gather all necessary tools. Having the right equipment makes the job much smoother and ensures a secure mount.
- Drill: A hammer drill works best for brick.
- Masonry Drill Bit: Essential for creating holes in brick.
- Wall Anchors: Choose ones specifically designed for masonry.
- Screws: Use stainless steel screws for durability.
- Screwdriver: A power screwdriver is ideal for tight fittings.
Starting with the right tools ensures a smooth process. This helps in securely fixing your Nest Camera, so it stays in place even during harsh weather. Make sure everything is within reach to avoid unnecessary interruptions.
Choosing the Perfect Spot
Selecting the location is crucial for optimal coverage and access to Wi-Fi. Consider areas that need monitoring and ensure they’re within the camera’s range.
Brick walls often offer limited placement options due to their structural design. Look for flat surfaces away from obstacles that might block the camera’s view. Ensure the spot is within range of your Wi-Fi network for seamless connectivity.
A good location not only provides better surveillance but also enhances the camera’s functionality. Think about the most vulnerable areas of your property and position the camera accordingly. Aim for a height where it’s out of reach but still covers the desired area.
Marking the Drill Points
Marking the correct points on the brick is essential for a secure mount. This step ensures alignment and prevents unnecessary drilling.
Use a pencil or chalk to mark the spots where you’ll drill. The marks should align with the camera’s mounting bracket. Ensure they are level to avoid a tilted camera angle.
Accurate markings make the drilling process easier and more precise. This helps in fitting the wall anchors correctly, which is crucial for a stable mount. Double-check your marks before proceeding to drill.
Drilling into Brick the Right Way
Drilling into brick requires patience and precision. Using the right technique prevents damage to both your wall and equipment.
Attach a masonry drill bit to your hammer drill. Start with a smaller bit and gradually increase the size. Drill slowly and steadily to maintain control and prevent cracking the brick.
This method helps in creating clean holes for the wall anchors. Proper drilling ensures the anchors fit snugly, providing a strong base for your camera. Take your time with this step for the best results.
Installing Wall Anchors
Wall anchors are crucial for securing the screws in brick. They provide the necessary grip to keep the camera mount stable.
Insert the wall anchors into the holes you’ve drilled. Tap gently with a hammer if necessary, ensuring they are flush with the wall surface.
Installing wall anchors correctly ensures your screws have a firm hold. This stability is key to preventing the camera from shifting or falling. Ensure they are fully seated before proceeding to the next step.
Securing the Mounting Bracket
The mounting bracket holds the camera in place. Proper installation is vital for maintaining the camera’s position and angle.
Align the bracket with the wall anchors and insert the screws. Use a power screwdriver for a tight and secure fit. Ensure the bracket is level and firmly attached to the brick.
Securing the bracket properly prevents the camera from wobbling or shifting. This stability is crucial for reliable surveillance and maintaining the intended viewing angle. Double-check the tightness of the screws.
Attaching the Nest Camera
With the bracket in place, it’s time to attach the camera. This step finalizes the installation and prepares your camera for use.
Slide or screw the camera onto the mounting bracket according to the manufacturer’s instructions. Ensure it clicks or locks into place securely.
Attaching the camera correctly ensures it remains stable and secure. This final step prepares your camera for operation, allowing you to adjust settings and start monitoring your property.
Adjusting the Camera Angle
Adjusting the camera to capture the desired view is essential. This step optimizes surveillance and ensures comprehensive coverage.
Use the adjustable features of the mount to tilt or swivel the camera. Aim for a view that covers the most critical areas, minimizing blind spots.
Proper adjustments enhance the camera’s effectiveness in monitoring your property. Ensure the camera covers entry points and high-traffic areas for maximum security. Test the camera’s view before finalizing.
Connecting to Wi-Fi
Connecting your camera to Wi-Fi is necessary for remote monitoring. Ensure your network is secure and within range.
Follow the Nest Camera’s setup process to connect to your home Wi-Fi. Ensure the signal is strong enough for seamless streaming and alerts.
A stable Wi-Fi connection ensures reliable performance and real-time updates. This connectivity is essential for accessing camera feeds remotely and receiving notifications.
Testing the Setup
Testing ensures everything works as expected. This step verifies the camera’s functionality and connectivity.
Check the camera’s live feed through your app or computer. Confirm that the view is clear and covers the intended area. Test motion detection and notifications.
Testing your setup ensures any issues are identified and resolved promptly. This step confirms your camera is ready to protect your home effectively. Make any necessary adjustments based on the test results.
Troubleshooting Common Issues
Sometimes, setups don’t go as planned. Understanding common issues helps in resolving them quickly.
If the camera doesn’t connect, check your Wi-Fi settings and strength. Reposition the camera for a better signal if necessary. Ensure the firmware is up to date and the app settings are correct.
Addressing these issues promptly ensures your camera remains operational. Troubleshooting helps maintain continuous surveillance and peace of mind. Don’t hesitate to reach out to support if needed.
Maintaining Your Nest Camera
Regular maintenance ensures longevity and optimal performance. Simple upkeep tasks can prevent future problems.
Clean the camera lens periodically to prevent dirt buildup. Check the mount for stability and tighten screws if needed. Ensure software updates are applied to keep features current.
Proper maintenance extends the life of your camera and ensures continuous protection. Regular checks help in identifying potential issues before they become significant problems.
Enhancing Security with Additional Features
Adding extra features can boost your security setup. Explore options that complement your Nest Camera.
Consider adding additional cameras for broader coverage. Use smart lighting to enhance night vision capabilities. Integrate with other smart home devices for a comprehensive security system.
Enhancements increase the effectiveness of your security measures. Additional features can deter intruders and provide more detailed monitoring. Customize your setup based on your specific needs.
DIY vs Professional Installation
Deciding between DIY and professional installation depends on your comfort level. Both have distinct advantages.
DIY installation gives you control and saves money. Professional installation offers expertise and guarantees optimal setup. Consider your skills and time availability when choosing.
Choosing the right installation method ensures a successful setup. Evaluate your needs and capabilities to make an informed decision. Either way, a secure setup is the ultimate goal.
Leveraging Community Insights
Joining a community of Nest Camera users can provide valuable insights. Learn from others to enhance your setup.
Online forums and social media groups offer tips and advice. Share experiences and ask questions to resolve issues quicker. Stay updated on new features and enhancements.
Engaging with a community enhances your knowledge and setup. Community insights can improve your camera’s performance and security measures. Don’t hesitate to participate and share.
FAQs With Answers
How do I check if my wall anchors are secure?
Ensure wall anchors are flush with the wall surface. Gently tug to test their firmness before attaching the bracket.
Can I adjust the camera angle after mounting?
Yes, most mounts allow for post-installation adjustments. Use the mount’s swivel or tilt features to change angles.
What should I do if my camera doesn’t connect to Wi-Fi?
Check your Wi-Fi settings and ensure the camera is within range. Reset the camera and try reconnecting.
Is professional installation necessary for brick walls?
Not necessarily. With the right tools and instructions, DIY installation on brick is feasible for most people.
How often should I clean the camera lens?
Clean the lens every 3-4 months or as needed. Regular cleaning prevents dirt buildup and ensures a clear view.
Conclusion
Installing a Nest Camera Battery on a brick wall may seem challenging, but with the right approach, it becomes a straightforward task. By following the steps outlined in this guide, you can enjoy enhanced security and peace of mind. The process involves careful planning, the right tools, and attention to detail, ensuring a secure and efficient installation. Remember, this investment in your home’s safety is not just about the device itself but also about ensuring a better quality of life. Begin your installation today, and take the first step towards a safer, more secure home environment.


